Introduction
Seed propagation is, alongside rhizome propagation, one of the two routes for obtaining cardamom plants. In Colombia, seed is the most relevant route when the goal is to scale up production, and the most accessible option when the budget does not stretch to certified rhizome.
The problem is that specific guidance on seed germination is almost never available. Most nursery documentation covers rhizome in detail and treats seed as an afterthought: “it can also be done, but it requires different practices.” That is exactly the gap this article fills.
First, the honest warning. Cardamom germination is slow and sensitive. If you have come looking for a result within a week, you will be disappointed. What you will find here is the complete protocol, the reference ranges we use, and the most common mistakes.
Seed or rhizome: why the decision matters
Before diving into the protocol, it is worth comparing both routes, because the choice changes everything else.
| Aspect | Seed | Rhizome |
|---|---|---|
| Time to ready plant | Slower (9 to 12 months) | Faster (6 to 9 months) |
| Cost per plant | Low | High |
| Plants per batch | Many | Limited by rhizome availability |
| Survival rate | Lower | High |
| Batch uniformity | Variable | More homogeneous |
| Recommended use | Scaling up production | Commercial plantations and mother block |
Practical recommendation: if you are planting fewer than 500 plants, start with rhizome. If you need thousands, seed is mandatory because there are not enough rhizomes available.
Step 0: sourcing quality seed
This step determines the success of everything that follows. Poor seed does not germinate, and there is no technical fix to reverse that.
Where to source seed?
In Colombia there are two reliable sources:
- Your own farm’s harvest. This is the safest option, because you know exactly where it comes from and how fresh it is.
- Your farm’s immediately preceding harvest. If you have no production of your own, a neighbouring producer with a current-season harvest is the best source.
- Sector institutions such as ICA and universities in the Coffee Region (Eje Cafetero), which manage multiplication plots.
What to avoid: seed of unknown origin and seed that has been stored for several years. Cardamom viability drops quickly.
Seed must be less than 30 days from collection
That is the most critical parameter, and the hardest to meet if you buy from outside the region. Seed more than two months from collection already germinates at a very low rate.
Indicators of healthy seed
- Origin: from a ripe fruit, green or yellowish, from the current harvest.
- Appearance: small seed, dark brown to brownish in colour, firm, without cracks.
- Smell: no smell of mould or rancidity.
Field-validation note: the viability ranges and treatments described below are technical references. Each batch responds differently depending on origin, drying method and storage. Juan Pablo, the author of this article, can compare them against his on-farm experience.
Step 1: collecting and preparing the seed
Collecting the fruit
Cardamom fruit is collected at the exact point of ripeness, recognisable by:
- Colour: intense green starting to turn yellow, without reaching brown.
- Pod: slightly open at the tip, without the seed having come loose.
- Smell: intense aroma in the pod.
Fruit collected too early will not germinate; fruit that is too ripe loses its seed as it dries.
Extracting the seed
This is a manual process. Tools and steps:
- Shelling. Open the pod on a clean surface. A fresh cardamom pod is hard; use a small tool or gently split it with your fingers.
- Separation. The seeds are very small (2-3 mm). Remove pod remnants with a fine sieve or by hand.
- Cleaning. Discard seeds with stains, that are split open, or that show signs of mould.
Drying the seed
This step is underestimated and is where viability is lost.
- Dry in the shade, never in direct sunlight. Direct sunlight kills the seed.
- Spread it in a thin layer on paper or cloth.
- Time: 2 to 5 days, until completely dry to the touch.
- Target: less than 10% moisture. If the seed bends when folded, it is still damp.
Storage
- Airtight container, in a dry, dark place.
- Ideally at a temperature between 15 and 20 °C.
- Do not freeze the seed.
- Use the seed within 30 days of collection. That is the window with the best germination.
Step 2: choosing and preparing the substrate
The germination substrate must be light, airy and as sterile as possible. The seed is small and its growth point has little reserve: a heavy, compacted substrate suffocates it.
Recommended substrate
A mix that works well in the nursery:
| Component | Proportion | Contributes |
|---|---|---|
| Coir (coconut fibre) | 60% | Retains moisture without compacting |
| Perlite or vermiculite | 20% | Aeration, drainage |
| Sterile commercial growing substrate | 20% | Base nutrients, structure |
| Very well-matured compost | 5% (max) | Nutrient contribution; no more, because it compacts |
Alternative: a ready-to-use commercial germination mix works if it is light and airy. Avoid pure garden soil: it carries pathogens and tends to be too dense.
Sterilisation (recommended)
For a reliable germination batch, sterilise the substrate before sowing:
- Steam: 30 minutes at 100 °C.
- Fungicidal solution: according to the product.
- Solarisation: leave the substrate in a closed bag in the sun for 3-4 days.
Step 3: pre-treating the seed
An optional step that significantly reduces soil-borne fungal attack.
- Prepare a fungicide or biofungicide at the concentration recommended by the product (usually a 10-minute immersion).
- Immerse the seed for 10 minutes.
- Rinse with clean water immediately, to avoid leaving residues that could damage the embryo.
Do not skip the rinse. Most phytotoxicity damage comes from failing to rinse after treatment.
Step 4: sowing
Depth and spacing
- Depth: 1 to 1.5 cm. Deeper delays emergence and can cause rotting.
- Spacing: 3 to 5 cm between seeds. If placed closer together, seedlings crowd each other as they sprout and fungi appear from contact.
- Orientation: the seed is placed with its most pointed end facing down.
Trays
- Germination trays with cell plugs of 5 cm or more.
- Optional: absorbent paper in a tray, a method widely used for home germination, but overwatering must be avoided.
- Fill with substrate and compact lightly without pressing firmly.
Initial watering
- Water the substrate thoroughly before sowing, not after. Watering afterwards displaces the seeds.
- After sowing, maintain moisture with gentle mist irrigation or capillary watering (tray underneath with water and substrate on top), never pouring water directly on top.
- Moisture must be constant, not saturated. A waterlogged substrate is the number one cause of rot.
Step 5: germination conditions
This is the factor almost everyone gets wrong.
Temperature
| Range | Result |
|---|---|
| 25 to 30 °C | Optimal. Germination in 15-25 days, good rate |
| 20 to 25 °C | Slow but viable. 25-40 days |
| Below 20 °C | Very slow, low germination |
| Above 35 °C | Seed damage |
Temperature is the factor that most affects germination and the least controllable in a nursery without heating. For this reason, it is best to germinate during a warm-weather period or in a protected space.
Humidity
- Constant, not saturated. The bed should be moist to the touch, never soaked.
- Light: indirect light until the cotyledons appear. Afterwards, gradual gentle sunlight.
- Ventilation: important. Without air circulation, fungi appear. A seed batch needs ventilation twice a day.
Greenhouse effect
A medium with a transparent cover (such as a bag or dome) helps maintain temperature and humidity, but:
- It must be ventilated daily once the first sprouts appear.
- Do not leave it sealed: condensation rots the bed.
Step 6: how long it takes and what to expect
Typical timeline
| Day | What happens |
|---|---|
| 0-3 | Sowing. The seed hydrates |
| 3-7 | Visible swelling if the process is going well |
| 7-12 | Radicle emergence begins |
| 15-25 | First germination: cotyledons emerge from the substrate |
| 25-35 | True leaves appear; transplanting possible if roots allow |
| 3-9 months | Ready to transplant to the field or a larger bag |
Critical factor: once 25 days have passed without any emergence, the batch will no longer germinate well. Discard it and review your management.
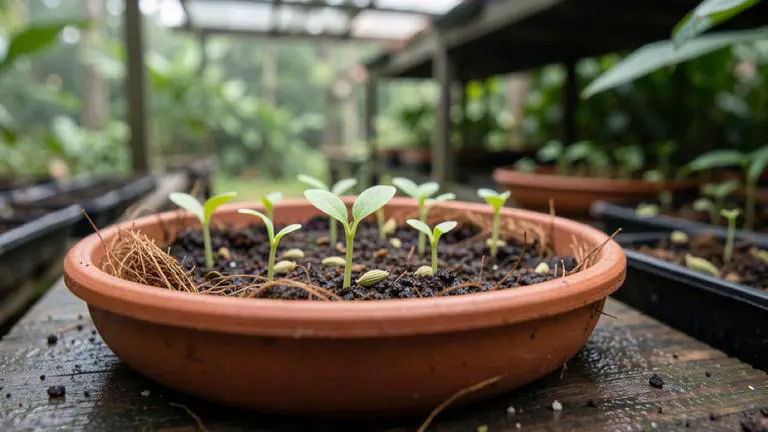
Signs of successful germination
- Cotyledons light green, rounded, opening like two valves.
- Fine, straight white root.
- Vertical growth.
- No brown spots or white fuzz (that is mould).
When to transplant
Do not transplant until the seedling has at least 3-4 true leaves and a visible root system of about 3-5 cm. If transplanted too early, the shock will kill it.
- Hardening off (acclimatisation): 10-14 days before planting in the field.
- For 3-4 days, leave the seedlings outside in the shade, for a while in the morning and gradually increasing afterwards.
- Avoid direct sunlight during the first weeks after transplanting.
- Fertilisation: start gently with a very diluted foliar fertiliser. Cardamom seedlings are sensitive to salinity.
Most common mistakes
| Mistake | Consequence | How to avoid it |
|---|---|---|
| Old seed, more than 2 months | Does not germinate | Buy from the current cycle; within 30 days |
| Seed not dried properly | Mould and rotting | Dry in the shade until <10% moisture |
| Substrate too dense | Root suffocation | 60% coir + 20% perlite + 20% commercial |
| Temperature below 20 °C | Minimal germination | Germinate in warm weather or a protected space |
| Watering over the bed | Washes away and rots the seeds | Water the substrate beforehand, then mist irrigation |
| Saturated bed | Fungi, root rot | Keep moist, not soaked |
| No dome ventilation | Green or white mould | Ventilate 1-2 times a day |
| Transplanting too early | Shock and death | Wait for 3-4 true leaves and 3-5 cm of root |
| Leaving the cover sealed | Condensation, rotting | Remove the dome once cotyledons appear |
Operational summary
- Seed from the current harvest, less than 30 days old. This is factor #1.
- Dry in the shade for 2-5 days, until it no longer bends when folded.
- Light, airy substrate: 60% coir, 20% perlite, 20% commercial. Never pure garden soil.
- Sow at 1-1.5 cm, seeds spaced 3-5 cm apart.
- Water the substrate BEFORE sowing. Afterwards, only gentle misting.
- 25 to 30 °C. Below 20 °C, low germination.
- 15-25 days for first germination. No sprouts by day 25, review your management.
- Ventilate daily and keep moist, never saturated.
- Transplant at 3-4 true leaves, with 10-14 days of acclimatisation.
- Opt for rhizome if you need few plants; for seed if you need thousands.
About the author
Juan Pablo Toro López is an Agroindustrial Engineer (Universidad La Gran Colombia) with more than 15 years of experience in the food production chain: production, food safety, process standardisation and export requirements. He has taught agroindustry at SENA and at universities such as Universidad Andina and Fundación Universitaria San Martín, and has advised companies in the sector on digital marketing and sales. See the author’s full profile.
About Cardamomo Colombia
We are producers and exporters of Colombian cardamom. If you are looking for quality seed or rhizome for your nursery, information on producer purchase prices, or agronomic management advice for your plot, write to us through the contact form.
Sources and recommended reading
- Cardamom Cultivation Manual (ICA, Instituto Colombiano Agropecuario) — institutional reference for propagation in Colombia.
- Technical guides from Universidad Nacional and CEPRO on production in the Coffee Region (Eje Cafetero).
- Technical material from ICTA-CRIA (Guatemala) on seed propagation.
- JICA documentation on Tahiti and the propagation of Elettaria cardamomum.
Temperature, humidity, depth and time ranges are technical references. Each seed batch responds differently depending on origin, variety, drying method and storage. For a specific result, validate with a technician in your area and record the collection date of the seed you use.